Preparedness
Paradise Nightmare: US Tourist Faces 12 Years for Forgotten Ammo

For Ryan Watson, an American tourist, a dream Caribbean vacation quickly turned into a distressing ordeal filled with ‘terrifying interrogations’ and substantial living expenses, when four rounds of hunting ammunition were found hidden in his luggage. Watson and his wife had travelled to the island of Turks and Caicos for a leisure trip, one that saw them landing a potential 12-year prison term.
The couple, hailing from Oklahoma, made the journey in early April to join friends in celebrating their 40th birthdays. On the 12th of April, security personnel at Howard Hamilton International Airport discovered the ammunition, which had been inadvertently left in a duffel bag post a deer hunting trip, as detailed on a GoFundMe page set up on the family’s behalf.
Surprisingly, the ammunition made its way through security checks at their home airport, Will Rogers World Airport. The Transportation Security Administration is currently investigating this lapse in security.
“TSA is conducting a review at OKC, which was the originating airport,” the Transportation Security Administration said in a statement.
In Turks and Caicos, both Ryan and Valerie Watson faced charges for possession of ammunition, an offence that carries a minimum sentence of 12 years behind bars.
Watson reported to the Daily Mail that their arrest was followed by a “terrifying interrogation”. He added, “It was all pretty intimidating.”
Valerie commented on WBTS-TV, “When I heard that, I immediately was terrified because I was like, we can’t both be in prison for 12 years. We have kids at home. And this is such an innocent mistake that we didn’t even know we weren’t – we didn’t even know it was there. So yeah, my immediate thought was our kids and them being, you know, parentless for, for that long.”
Valerie, an elementary school teacher, was eventually cleared of the charges and returned home to be with their children.
In an attempt to secure Ryan’s release, Oklahoma Governor Kevin Stitt reached out to the Turks and Caicos Islands government.
“The Watsons are upstanding members of their community and the State of Oklahoma, and I can assure you countless others stand willing to confirm their high moral characters,” Stitt wrote.
“First and foremost, the Watsons are devoted parents,” Stitt said. “Their two young children, Van and Ellie, need their parents home without delay. Mr. and Mrs. Watson would never intentionally break the law. Again, they are unwavering in moral character, reliable neighbors, and devoted community members.”
Ryan Watson, after nearly two weeks in custody, was able to secure his release by paying a $15,000 bond. There were conditions attached, including forfeiting his passport and staying within the country’s boundaries, while also regularly reporting to local authorities.
The involuntary extended stay in Turks and Caicos has resulted in significant expenses for Watson. He has reportedly been residing in a $500-a-night Airbnb, financially supported by his in-laws.
A GoFundMe set up for the Watson family has garnered close to $210,000 in donations to cover legal and living expenses.
The next court appearance for Watson is slated for June 7th.
Watch a local news report about the incident below:
Let us know what you think, please share your thoughts in the comments below.
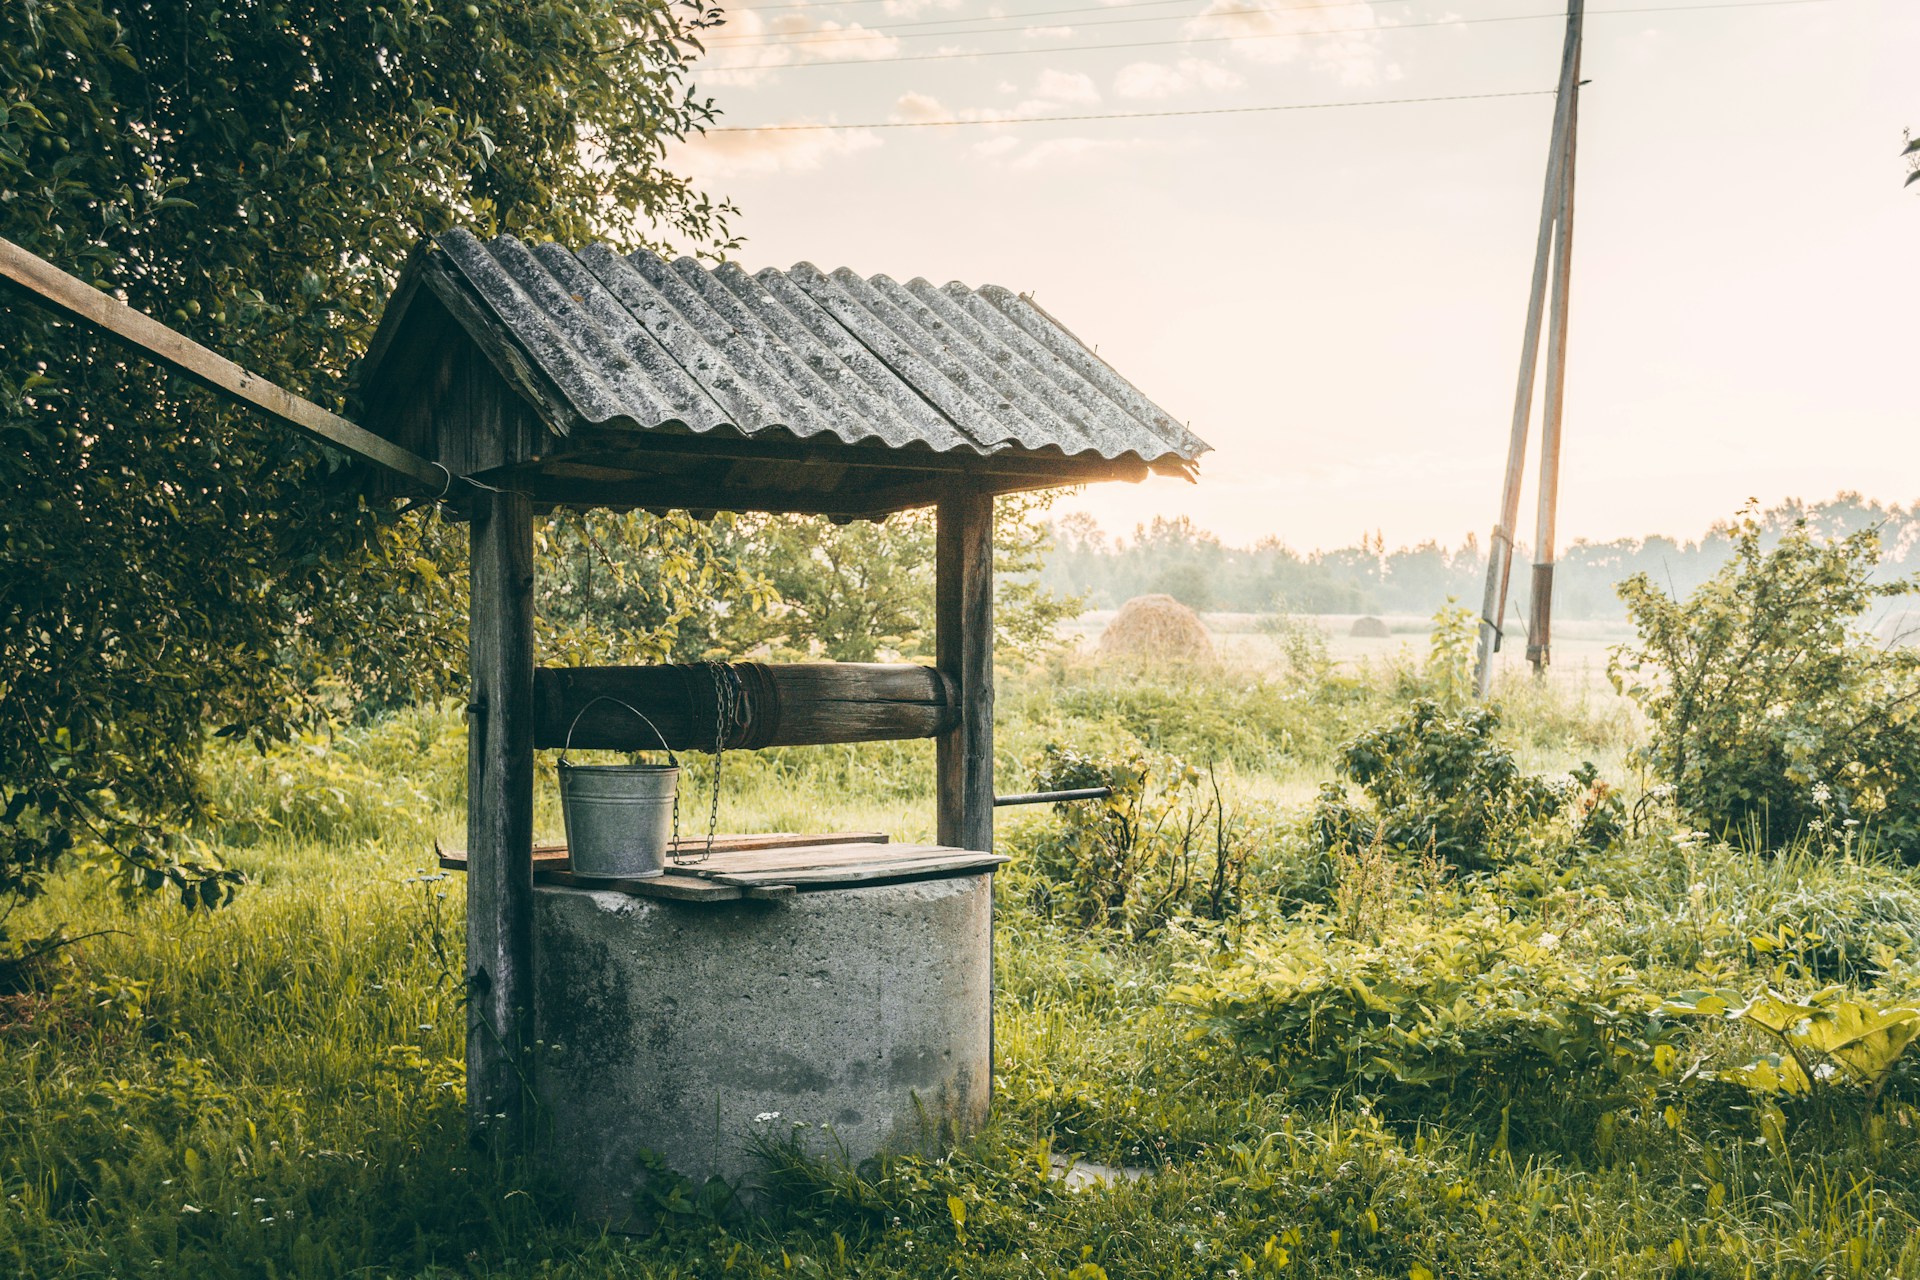
Water is an indispensable resource, especially for those who embrace the homesteading lifestyle. It’s crucial for drinking, cooking, sanitation, and supporting livestock and gardens, all of which are integral to a self-sufficient home. While public water systems are available, they aren’t always reliable or accessible, particularly in rural areas.
For those looking to ensure a steady water supply, digging a well on your property is a vital step. Before embarking on this endeavor, it’s important to consider several key factors to ensure success and safety.
First, identify the purpose of your well. Are you seeking a primary water source for your household, or do you need water for agricultural purposes? Each scenario requires a different approach. A well for landscaping might be a DIY project, as the water won’t be used for human or animal consumption. However, if the well will supply your household or animals, it’s advisable to consult with licensed professionals to guarantee safe water quality.
Despite the long history of well-digging, it’s not as simple as grabbing a shovel and digging until you hit water. Most states and jurisdictions have specific regulations governing well construction due to safety concerns and existing utilities. For instance, some areas require permits for drilling beyond a certain depth, such as 200 feet, or mandate professional drilling services.
Before you begin, research local regulations thoroughly. Key considerations include:
– Local regulations about water wells
– Required well depth for healthy water
– Maximum allowable well width
– Distance requirements from structures, sewer pipes, or septic lines
– Structural components needed to meet safety codes
– Awareness of underground utility lines
– Necessary permits and permissions
Once you’ve navigated the regulatory landscape, the next step is selecting the optimal location for your well. This decision is crucial, as an improperly placed well may yield insufficient or contaminated water. Investigate whether other wells exist nearby, as they can impact water availability. Additionally, consider the property’s topography, including hidden aquifers or rock formations.
Avoid locations near septic tanks, sewers, muddy areas, or waste matter to prevent contamination. Many people underestimate the depth required to access safe water, often needing to dig 100 feet or more. This depth ensures the water is free from contaminants like fertilizers.
Given the complexities and potential hazards of deep well digging, it’s often best to hire professionals. However, if you’re determined to undertake the project yourself, you can purchase a DIY well kit or gather the necessary components. Essential items include:
– 1.5 times the depth of your well in air hose
– 1.5 times the well depth in 1″ PVC pipe for the permanent well tube
– 300 feet of rope or more, depending on well depth
– 5 feet of 8″ PVC and 10 feet of 2″ PVC
For a DIY approach, follow these basic steps from A&T Well and Pump:
Begin by digging down about 5 feet with an auger or post-hole digger, fitting an 8″ PVC pipe into the hole with 4 inches above ground. Drill a 2″ hole into the pipe’s side and insert the 2″ PVC. Create a settling pond 10 feet away, connect it to the well with an 8-inch ditch, and cover the 2″ PVC pipe with dirt to transfer clean water.
Place a drum at the pond’s edge, facing the well. As the drum collects water from the well, it will empty into the pond and flow back in. Secure the PVC pipe to the drill, ensuring no leaks, and run the other end into a 55-gallon drum to create a space for mud and water to empty.
Drilling the well can take hours or weeks, depending on soil type and the tools or assistance available. Fill the well hole with water, activate the drill, and move it to break up the soil. When adding more pipe, remove the running drill from the water, turn off the pressure, and continue drilling downward.
Once you reach the desired depth, case off the well with SDR 35 pipe, extending 3 feet above ground, and secure it with concrete and pea gravel to prevent contamination. Finally, install your well pump, run the water until clear, and test it for safety.
For visual learners, A&T Well and Pump offers a YouTube video demonstrating the well-digging process.
Let us know what you think, please share your thoughts in the comments below.
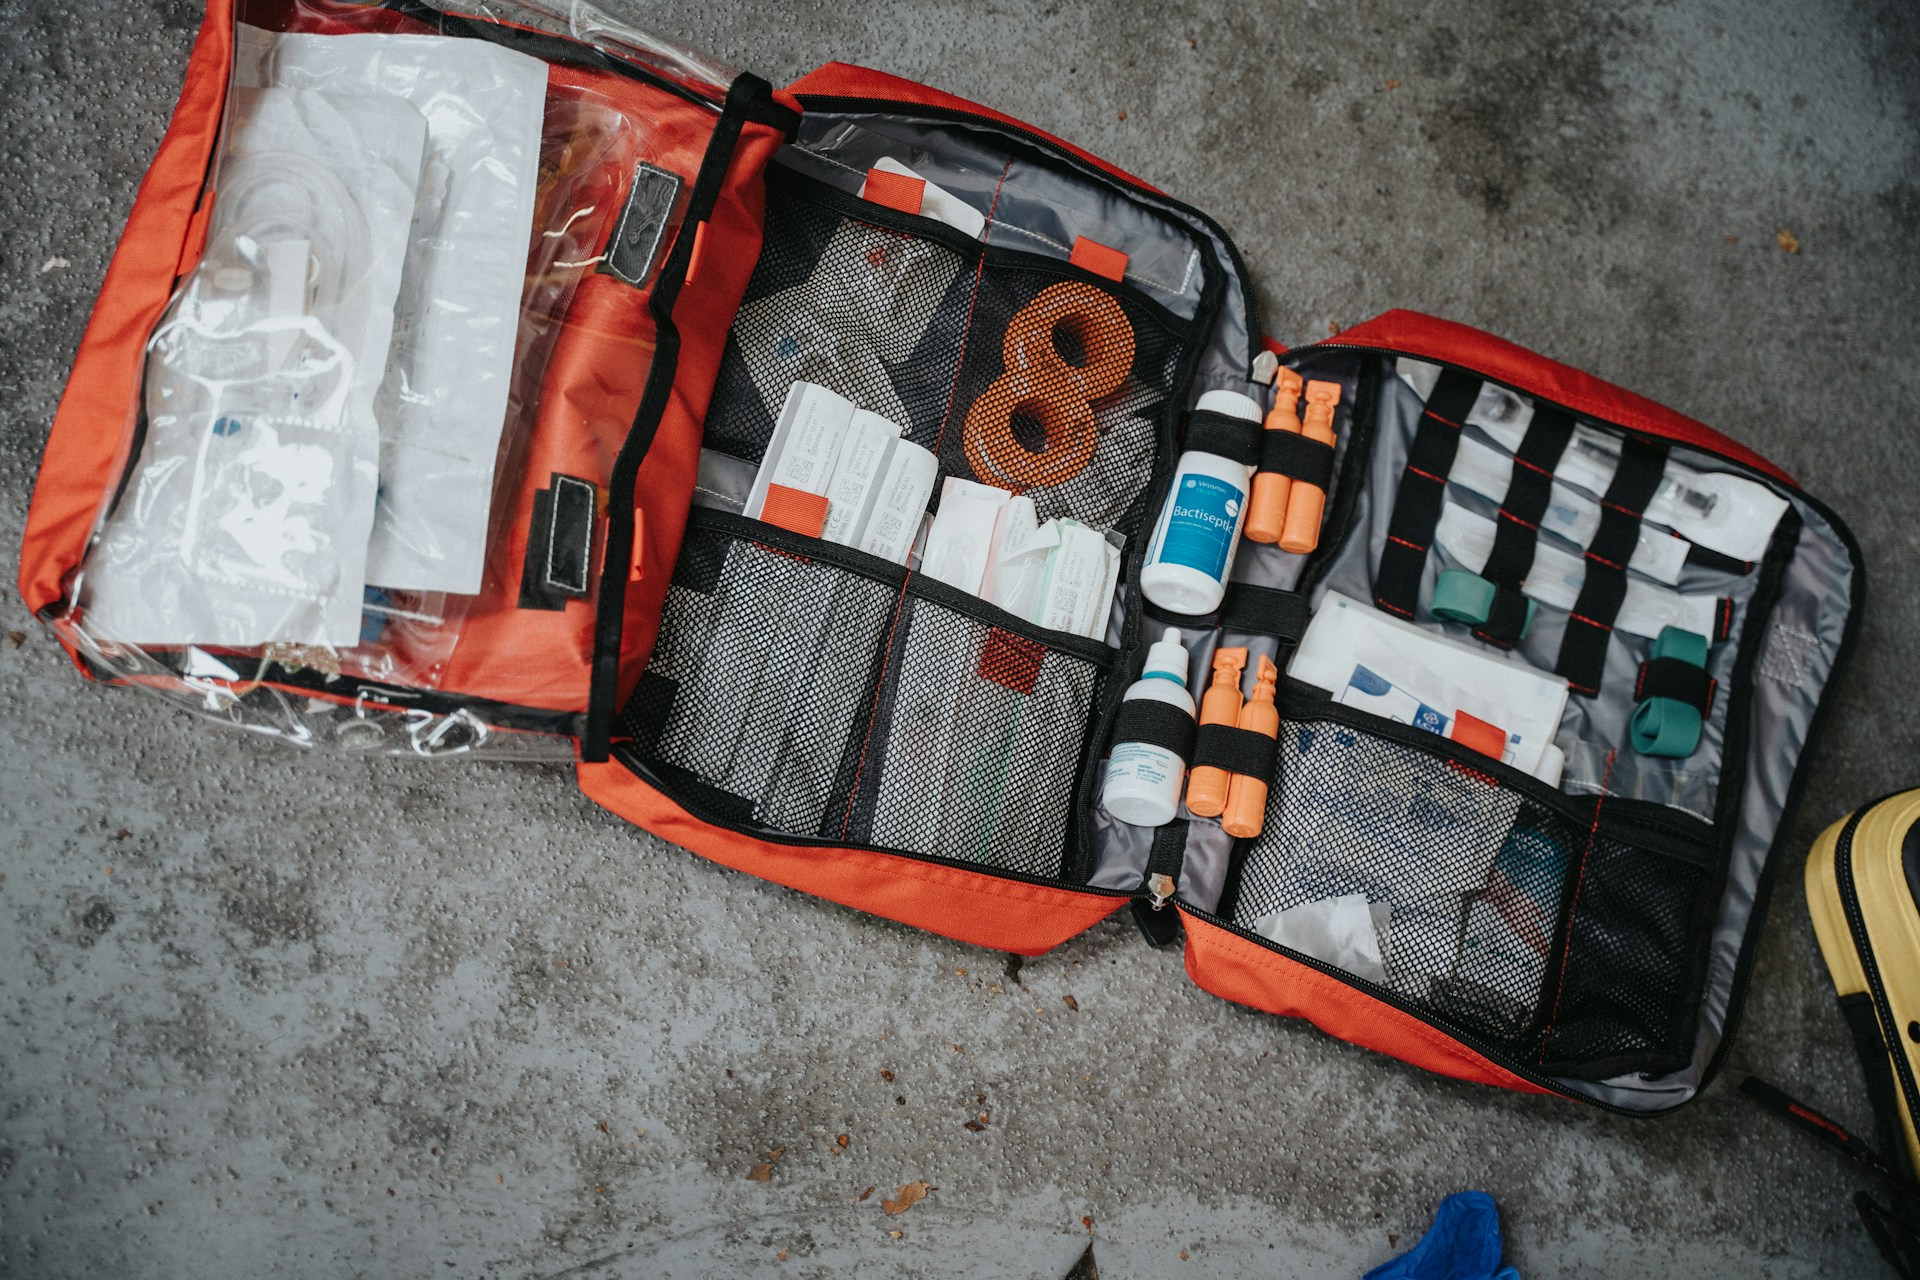
When preparing for medical emergencies away from home, many people stop at purchasing a first aid kit. While these kits serve as a good foundation, they often fall short of comprehensive preparedness.
To truly be ready, it’s crucial to start by taking a basic first aid course. These courses are generally affordable and sometimes even free through civic groups or employers. Typically lasting 6-8 hours, they are designed with the assumption that Emergency Medical Services (EMS) are readily accessible.
However, for those who anticipate being in more isolated or challenging environments, a wilderness or remote first aid course is highly recommended. These courses, usually spanning two days, cost around $200, though community colleges may offer more economical options. They are tailored to equip you with the skills needed to handle medical emergencies when EMS could be delayed by up to 8 hours.
Pet owners should also consider a basic first aid course for dogs and cats. Larger pet stores often provide in-person classes, and the Red Cross offers online options for both pet and human first aid.
At home, having a well-organized and stocked first aid kit is essential. Whether you purchase a pre-made kit or assemble one yourself, it should complement your usual home medical supplies. The contents should reflect your medical knowledge and skills.
For “away from home” emergencies, focus on assembling two kits: a compact one for daily carry in a purse, briefcase, or commuter bag, and a slightly larger one for your 72-hour survival bag, commonly known as a Bug Out Bag (BOB). This bag goes by various names, including 72-hour kit, battle box, grab bag, go bag, GOOD bag (get out of Dodge), INCH bag (I’m never coming home), personal emergency relocation kit (PERK), or quick run bag (QRB).
The compact first aid kit should fit in a small zippered pouch. The M2 BASICS 150 Piece First Aid Kit is a solid choice, though it may require some customization. Consider removing the CPR mask, as current guidelines prioritize chest compressions. Instead, add pain relief tablets, sting relief, and other medications such as antacids, antidiarrheals, or cold remedies. Use small ziplock bags to organize multiple doses, labeling them with contents, dates, and standard dosages, or opt for single-use foil packs. A small tube of triple antibiotic ointment is also a valuable addition. Aim to keep this kit under 8 ounces.
Creating your own compact kit offers the flexibility to tailor it to your specific needs and available space. Soft-sided pouches, like pencil cases or small cosmetic bags, are preferable due to their packing flexibility. This kit is intended for everyday carry, not for your survival bag.
Essential items for your compact kit include:
– Various sizes and types of band-aids
– Self-Adherent Cohesive Bandage, also known as Coban™ or Vet Wrap, which can be used to secure gauze pads, wrap sprains, or hold splints
The goal of these kits is to sustain you through the initial 72 hours of an emergency. It’s important not to skimp on quality; even a simple band-aid should be reliable.
For your 72-hour bag, start with a sturdy, lightweight container. Soft pouches are recommended for their packing efficiency. You can find empty marked first aid bags to ensure easy identification during emergencies.
In addition to the compact kit items, include:
– Travel-sized tubes or containers for medications, ensuring you have at least a dozen of each type
– Hemostatic agents like Quick Clot gauze for severe bleeding
– Feminine hygiene products, space permitting
Customize your first aid kit to match your skill level. A full trauma or EMT kit is only useful if you know how to use the items.
Lastly, consider keeping duplicate first aid kits in each vehicle you own. This ensures you have access to essential supplies even if your Go Bag isn’t with you during an emergency.
Let us know what you think, please share your thoughts in the comments below.

In today’s unpredictable world, the ability to “shelter in place” effectively is a crucial skill that can make a significant difference in ensuring your safety and that of your loved ones. Whether faced with an active shooter, a natural disaster like a tornado, or chemical hazards, knowing how to respond promptly and appropriately is essential.
When authorities advise you to “stay put,” immediate action is necessary. Tune in to local radio or television stations for specific instructions tailored to the emergency at hand. The first step is to get inside, bringing your family, emergency supplies, and pets with you. The exact location within your home or building will depend on the nature of the threat.
Once you are securely positioned, it’s important to communicate with your emergency contact.
“Call or text your emergency contact. Let them know where you are, if any family members are missing, and how you are doing.”
Minimize phone usage to keep lines open for emergency responders, using it only for essential communication.
Stay informed by continuously listening to updates on your radio, television, or phone. Do not leave your shelter until you receive confirmation from authorities that it is safe. If evacuation becomes necessary, follow official instructions carefully.
In certain emergencies, such as chemical leaks, you may be instructed to “seal the room” to prevent outside air from entering. This involves turning off air-moving devices like fans and air conditioners, gathering your emergency supplies, and blocking air entry points.
“Once officials say the emergency is over, turn on fans and other things that circulate air. Everyone should go outside until the building’s air has been exchanged with the now clean outdoor air.”
Preparation is key to effective sheltering in place, especially during chemical incidents. Select a room with minimal windows and doors, preferably one with a water source, like a master bedroom connected to a bathroom. For chemical events, choose a higher floor to avoid sinking vapors, which contrasts with other emergencies like tornadoes where lower levels are safer.
If caught outside your home, avoid sheltering in vehicles as they are not airtight. Instead, head to the nearest safe building. If that’s not possible, pull over safely, turn off the engine, and listen to the radio for official updates.
“Modern car radios do not use much battery power, so listening to the radio for an hour or two should not cause your car battery to die.”
Stock your shelter room with essentials such as a flashlight, battery-powered radio, extra batteries, food, and bottled water. Aim for a gallon of water per person, and consider using water from a toilet tank if necessary. Prepare to seal the room with plastic sheeting and duct tape to cover windows, doors, and vents, ensuring an airtight environment.
For a comprehensive guide on preparedness, FEMA offers a free PDF booklet that serves as an excellent starting point for anyone looking to enhance their readiness for emergencies. Being prepared to shelter in place is not just about having the right supplies; it’s about having the right mindset and knowledge to protect yourself and your family when it matters most.
Let us know what you think, please share your thoughts in the comments below.
-

 Tactical12 months ago
70-Year-Old Fends Off Intruder with Lead-Powered Message
-
 Tactical12 months ago
Vape Shop Employee Confronts Armed Crooks, Sends Them Running
-

 Preparedness9 months ago
Ex-Ballerina’s Guilty Verdict Sends Tremors Through Gun-Owner Community
-

 Preparedness7 months ago
Good Samaritan Saves Trooper in Harrowing Interstate Confrontation
-
 Tactical1 year ago
Midnight SUV Theft Interrupted by Armed Homeowner’s Retaliation
-

 Survival Stories2 years ago
Emily’s 30-Day Experience of Being Stranded on a Desert Island
-

 Preparedness7 months ago
Arizona Engineer’s Headless Body Found in Desert: Friend Charged
-

 Preparedness7 months ago
Boy Saves Dad from Bear Attack with One Perfect Shot