Preparedness
Food Storage Basics: Maximizing Shelf Life and Nutrition

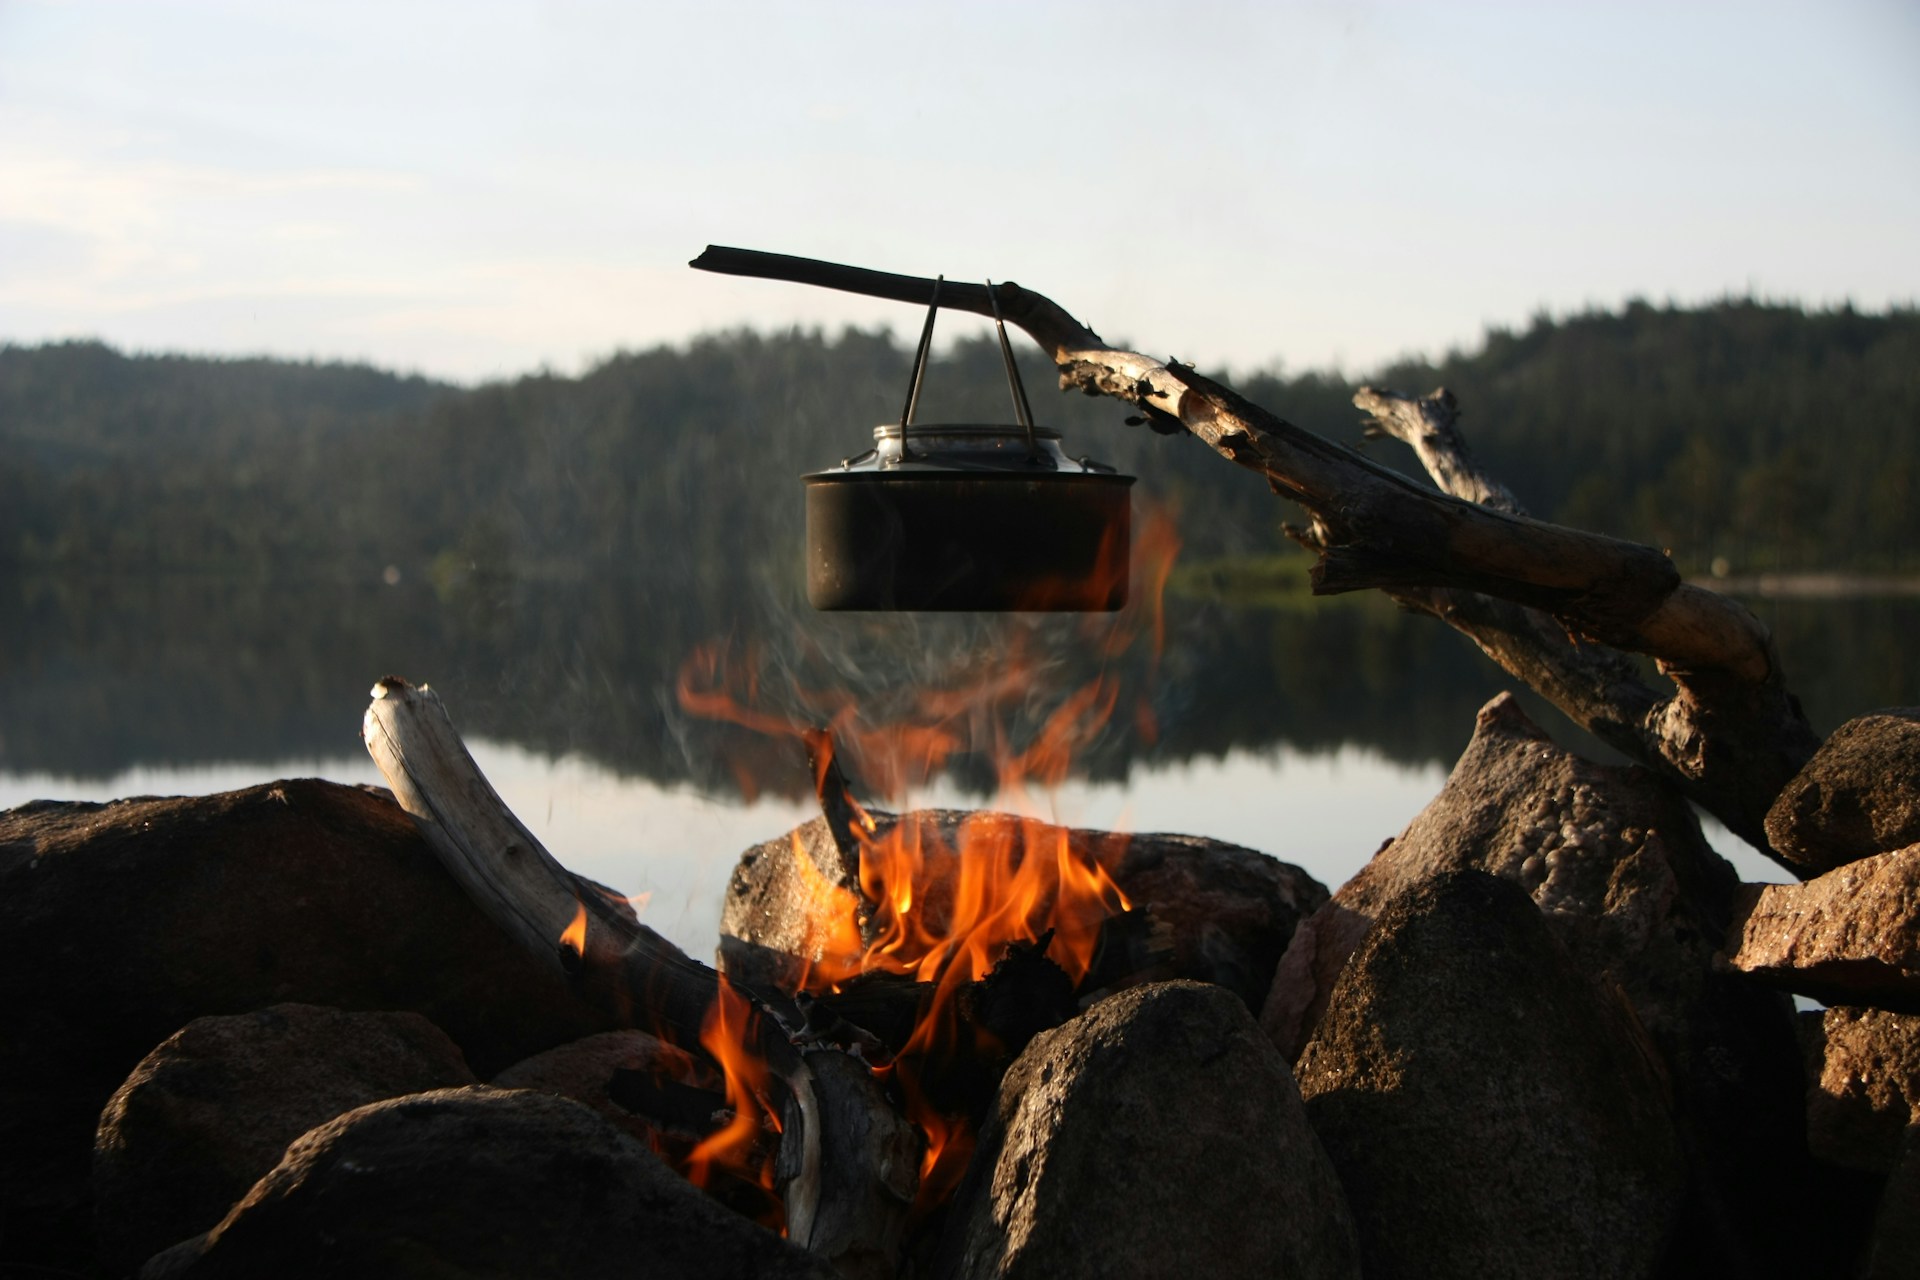
Now, let’s get down to brass tacks. If there’s one thing I’ve learned from my time in the wild, it’s this: food, along with water and shelter, is a fundamental pillar of survival. But it’s not just about having food; it’s about storing it right to maximize shelf life and nutrition.
When it comes to food storage, the first rule of thumb is to choose the right kind of food. Non-perishable items, such as canned goods, dried fruits, nuts, and grains, are your best bet. These bad boys can last for months, sometimes even years, without refrigeration. Just make sure to keep them in a cool, dry place away from sunlight.
Now, let’s talk about packaging. Oxygen absorbers are a great way to keep your food fresh for longer. These little packets remove oxygen from the storage container, slowing down oxidation and keeping those pesky bugs and bacteria at bay. Vacuum sealing is another excellent method. By removing air from the package, you can extend the shelf life of your food by up to five times.
But what about nutrition, you ask? Well, it’s no secret that over time, stored food can lose its nutritional value. The key here is rotation. Don’t just store your food and forget about it. Use it, replace it, and keep it moving. This way, you’re always eating the oldest items in your stockpile first, ensuring that you’re getting the most nutritional bang for your buck.
Freezing
Freezing is another method to preserve both shelf life and nutrition. Many fruits, vegetables, and meats can be frozen for extended periods without losing their nutritional value. However, remember that freezing only slows down spoilage; it doesn’t stop it. So, keep an eye on those expiration dates.
Dehydrating
Dehydrating is an age-old preservation method that works wonders. By removing water from your food, you inhibit the growth of bacteria, extending shelf life significantly. Plus, dehydrated foods maintain most of their nutritional value and can be rehydrated with a bit of water.
Canning
Canning is another tried-and-true method. It’s a bit more labor-intensive, but it can really pay off. By sealing food in airtight containers and heating them to kill bacteria, you can store canned goods for years. And the best part? Most of the nutrients are preserved, making canned food a nutritious option.
Freeze-drying
Now, for those of you who prefer a more high-tech approach, there’s freeze-drying. This process involves freezing the food and then reducing the surrounding pressure to allow the frozen water to sublimate directly from the solid to the gas phase. The result? Food that can last for years and retains most of its nutritional value.
Remember, folks, food storage is not a one-size-fits-all deal. The best method for you depends on your needs, resources, and circumstances. Experiment with different methods and find what works best for you.
And one last thing: always, always check your stored food before eating. Look for signs of spoilage like mold, off smells, or bulging cans. No matter how well you store your food, safety should always be your top priority.
So, there you have it. With a bit of knowledge and some careful planning, you can maximize both the shelf life and nutrition of your stored food. Because in the wild, it’s not just about surviving; it’s about thriving. And believe me, with the right food storage, you’ll be doing just that.
In the world of self-reliance and resourcefulness, mastering the art of improvisation can make everyday challenges much more manageable. One practical skill to have in your survival toolkit is the ability to create a functional stove from common household items, such as a soda can, a push pin, and a penny.
To begin, gather your materials: a small block of wood approximately two inches high and a penny minted in 1982 or earlier. The older penny is crucial because it is primarily copper, unlike those minted later, which contain zinc and can melt under heat.
First, take one of the aluminum cans and place it next to the block of wood. Use the pushpin to score a line two inches high around the can. This line will guide your cuts later.
Next, create holes for pouring fuel by placing the can upside-down on a hard surface. Use the pushpin to make five holes in the bottom, with the center hole being larger. To widen this center hole, insert the pin and rotate it in circles, pressing against the edges.
Now, make venting holes for the flames by puncturing sixteen holes between the inner and outer rims on the can’s bottom. Start by making holes at the top, bottom, left, and right, then proceed to the corners, and finish with the remaining holes in any order.
With the holes in place, use scissors to cut along the scored line on each can. You should have two aluminum pieces of similar size.
Crimp the edges of one can using pliers. Squeeze the open edge and twist gently to create small bumps or crimps. This step ensures a snug fit when assembling the stove.
Fill the crimped can nearly to the top with insulation, which will soak up the fuel and act as a wick, preventing spills.
To assemble the stove, fit the crimped piece inside the other can. For added durability, especially if you plan to transport or reuse the stove, consider securing the pieces with high-heat epoxy.
Set up the stove by placing a jar lid upside down on a hard surface. This lid acts as a bowl for fuel. Ensure it’s a single-piece lid to prevent leaks.
Pour a small amount of fuel into the jar lid, then into the top of the stove. Allow the fuel to fill the holes, then add more.
Finally, place the penny over the large center hole. This creates pressure, directing flames through the 16 vent holes.
“Beer can stoves under construction in Anzere, Switzerland” by Robert Thomson highlights the ingenuity behind such creations. For more details, visit the license at https://creativecommons.org/licenses/by-nc/2.0/.
With your stove ready, it can boil water in about 10 to 15 minutes and is perfect for preparing simple meals. Remember, this skill is not just about creating a stove; it’s about embracing the mindset of self-sufficiency and adaptability.
Let us know what you think, please share your thoughts in the comments below.

A trip to the beach is often synonymous with relaxation and fun, but it can quickly turn perilous if you’re not prepared. While most beachgoers might only leave with a sunburn requiring aloe vera, more serious incidents are not as rare as one might hope. Here are some essential safety tips to ensure your beach outing remains enjoyable and safe.
Understanding the beach’s flag system is crucial. Different beaches and states have their own colored flags with specific meanings. Always check with a lifeguard if you’re uncertain about what the flags signify.
“Generally, red flags indicate strong surf and currents (i.e., ‘Be Careful!’).” In some locations, a red flag can mean the beach is closed, so it’s vital to confirm before entering the water. A yellow flag suggests moderate surf and currents, meaning the water can be rough but not exceedingly dangerous; it’s wise to stay near lifeguards. Green flags signal calm or clear ocean conditions, though staying alert is always a good idea. Blue or purple flags warn of potentially dangerous marine life, such as sharks or jellyfish, in the area.
Not all beaches are suitable for swimming, so familiarize yourself with the rules before stepping onto the sand. Nature often provides warnings, such as rip currents, which are powerful water currents that can sweep even the strongest swimmers out to sea. These can form on any beach with breaking waves.
To identify a rip current, look for dark, choppy water with foam and debris moving out to sea. If you spot one, steer clear, as they are extremely hazardous. If caught in a rip current, remain calm. “Relax, and swim parallel to the beach. Don’t try to fight it.” If swimming becomes difficult, tread water and call for help. Parents should always keep their children close when they’re near the ocean.
Natural elements like logs on wet sand or in the water are dangerous, as the ocean can easily lift and drop them unexpectedly. Avoid logs in the surf or on wet sand. Additionally, watch out for “sneaker waves,” which can appear suddenly and with enough force to knock you down and drag you into the sea. Always keep an eye on the ocean.
Ocean spray and rain can make rocks and trails slippery, so stay behind fences and on marked trails. Avoid cliff edges, as they may not support your weight, and don’t stand under overhanging cliffs. Rocks and jetties might seem like great vantage points, but they are dangerous. Barnacles can cause painful injuries if you slip, and waves crashing against jetties can knock you into the ocean.
Tide pools are fascinating, but it’s important to keep track of the tide to avoid getting stranded. Free tide tables are available at state park offices and many local shops. Walking barefoot on the beach can lead to injuries from sharp objects hidden in the sand, so wear sturdy reef shoes.
Ensure you bring a change of clothes and attire suitable for both sun and rain. While sunscreen isn’t clothing, it’s crucial to apply it generously or choose SPF-rated clothing of 50 or higher. Don’t forget quality sunglasses to protect your eyes.
One of the most critical beach safety tips is to never let non-swimmers or young children play unsupervised near the water. A sneaker wave might just knock you over, but it can seriously injure a child. Stay sober and vigilant to ensure everyone’s safety.
If you feel a small earthquake while at the beach, most are minor and won’t generate tsunamis. However, if the quake is strong enough to make standing difficult, it could produce a tsunami. In such cases, “you have only a matter of minutes to get to higher ground.”
Do not waste time gathering belongings; prioritize getting your family to safety. “Ideally, get to a spot 100 feet above sea level or two miles away.” Every step inland or upward counts. If you can see the wave, you are too close for safety. Avoid standing on sandstone cliffs, as they may crumble when the wave hits. Do not attempt to evacuate by car; you must drop everything and run.
A Tsunami WARNING signifies that a tsunami may have been generated and could be approaching your area. A Tsunami WATCH indicates a tsunami has not been confirmed but could exist and may be as little as an hour away.
By adhering to these safety guidelines, you can ensure that your beach visit remains a day of relaxation and enjoyment, free from unexpected dangers.
Let us know what you think, please share your thoughts in the comments below.
Before the advent of modern MREs, a simple yet effective survival food powered both armies and explorers alike. Known for its longevity and simplicity, this food has been a staple from the tables of kings to the hands of common sailors. If you’re considering essential rations for a survival situation, this should be at the top of your list.
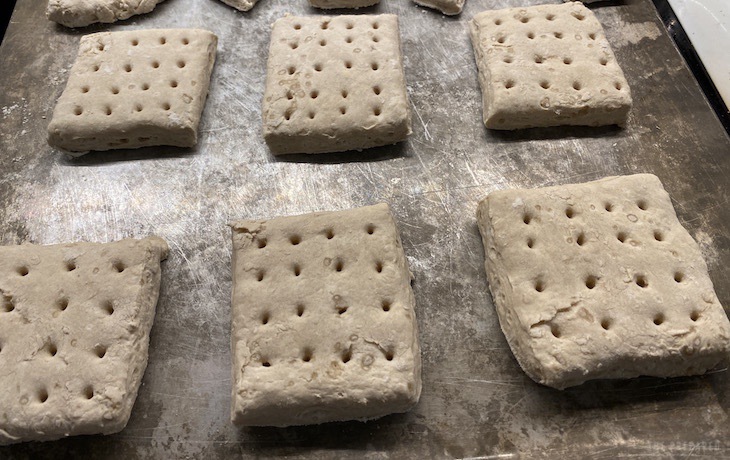
The food in question is hardtack, a basic blend of flour, water, and salt, baked into a dense biscuit. Each piece provides around 250 calories and 54 grams of carbohydrates, and its remarkable shelf life can extend to a century or more.
Hardtack’s history is as rich as its nutritional profile. Ancient Egyptian warriors carried millet flour cakes known as “dhourra” for their long sea voyages. Similarly, Roman soldiers consumed “bucellatum” as a staple ration. By the sixteenth century, British Royal Navy sailors were issued a pound of hardtack daily, accompanied by a gallon of beer.
One of hardtack’s unique properties is that it softens over time due to humidity exposure. This characteristic meant it was often prepared well in advance of consumption. However, when fresh, it lived up to its name—extremely hard and sometimes nearly inedible. Soldiers humorously dubbed it “tooth duller,” “iron cracker,” and “molar breaker.” To make it palatable, they would soak it in available liquids. Sailors used beer, while Civil War soldiers favored coffee for its warm, nutty flavor. Others used milk, soups, and stews.
Despite its toughness, hardtack remains an unparalleled survival food. It offers a straightforward way to sustain oneself for extended periods. In fact, you might encounter hardtack from over 150 years ago in Civil War museums, still intact and technically edible.
Even if you’re not a historical soldier or sailor, hardtack can still be a valuable addition to your survival kit. Its easy storage and high energy content make it ideal for off-the-grid living. It complements stews, soups, and other camp foods perfectly. Additionally, some preppers prefer it over storing flour, which has a shorter shelf life. “Why store flour, which goes bad after just a few months, when you can bake it into hardtack and store it for a lifetime?”
Creating hardtack is straightforward. Mix flour, salt, and a cup of water into a dough. Flatten the dough to a thickness of ¼ to ½-inch and cut it into squares. Poke holes into each square. Bake the biscuits in the oven at 375 degrees for 30 minutes. Once removed, allow them to dry completely.
Hardtack is more than just a relic of the past; it’s a practical solution for modern survival needs. Its simplicity, longevity, and nutritional value make it an indispensable resource for anyone preparing for uncertain times.
Let us know what you think, please share your thoughts in the comments below.
-

 Tactical1 year ago
70-Year-Old Fends Off Intruder with Lead-Powered Message
-

 Tactical1 year ago
Vape Shop Employee Confronts Armed Crooks, Sends Them Running
-

 Preparedness10 months ago
Ex-Ballerina’s Guilty Verdict Sends Tremors Through Gun-Owner Community
-

 Preparedness8 months ago
Good Samaritan Saves Trooper in Harrowing Interstate Confrontation
-

 Tactical1 year ago
Midnight SUV Theft Interrupted by Armed Homeowner’s Retaliation
-

 Survival Stories2 years ago
Emily’s 30-Day Experience of Being Stranded on a Desert Island
-

 Preparedness9 months ago
Arizona Engineer’s Headless Body Found in Desert: Friend Charged
-

 Preparedness9 months ago
Boy Saves Dad from Bear Attack with One Perfect Shot